
Trying MySQL MEMORY Tables as a Simple Cache (and Failing Spectacularly)
Benchmark MySQL memory tables as a cache layer, comparing performance, query speed, and resource usa...
A collection of technical notes and tutorials where I document experiments, share coding practices, and provide structured insights for developers.
Benchmark MySQL memory tables as a cache layer, comparing performance, query speed, and resource usa...

Explore a Spring Boot example of hexagonal architecture, showing how domain, application, and infras...

Create SOAP services in Spring Boot using the Bottom‑Up approach, leveraging JAX‑WS annotations ...

Implement the Command Pattern in Spring Boot with practical examples, demonstrating how to encapsula...
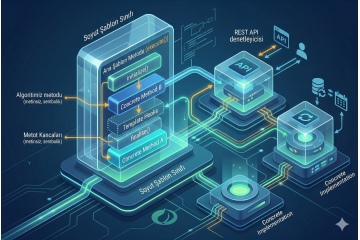
Apply the Template Method Pattern in Spring Boot with practical examples, illustrating how to define...

Implement rate limiting in Spring Boot with Redis, demonstrating token bucket strategies, request th...